There are several tutorials that can be found online at Wedding Mapper and even on the Bee (aka Weddingbee) by authors such as Mrs. Spring Roll. The directions to making such a map are quite simple but depending on the complexity and customization of the map, it can take a good bit of time to make one.
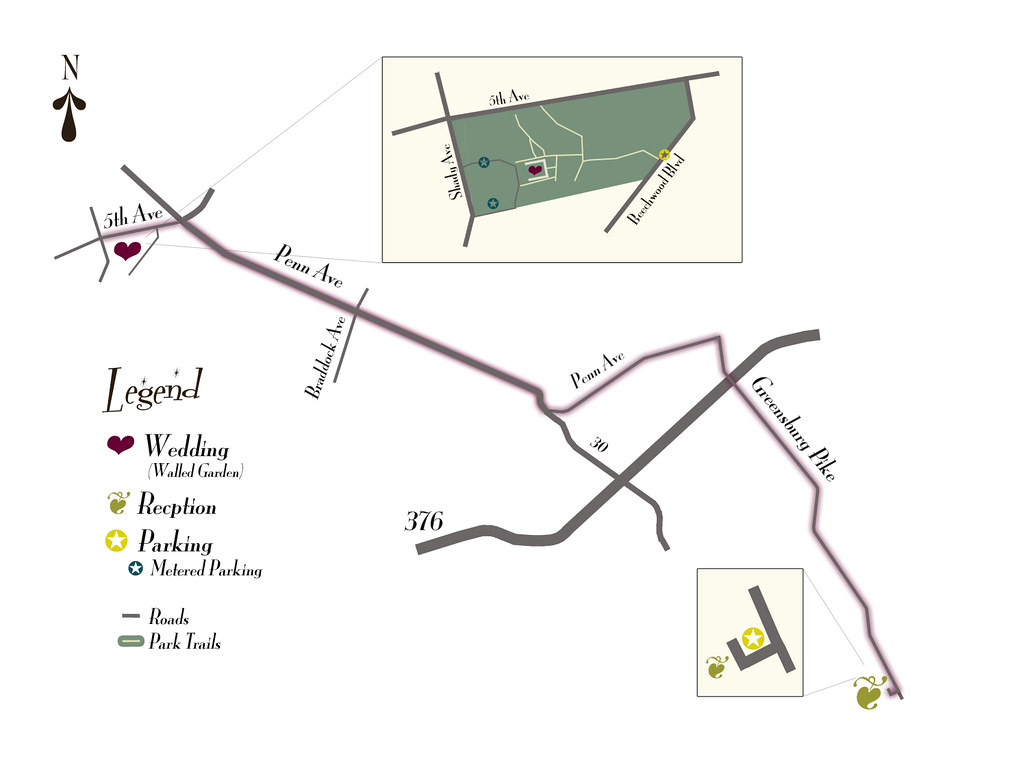
I chose to make a slightly complex hand-traced map with some enlarged areas. It took me 5 hrs and a lot of cussing at Photoshop but this is what I ended up with! =)
So how did I make such a map...
1. Look up Reference Map!
Use a map site such as google.com/maps to look up the directions from the wedding to the reception. Either right click to save the map provided or use screen print to save the map.
2. Trace Map
Open saved map in photoshop and create a new layer. This layer is where you will draw your map. I chose to use the line tool to make my lines as I'm a photoshop novice and not very good at using the pen tools. Trace all the major roads near and around the route using thicker lines for the major roadways. If your map contains major geographical objects such as rivers and lakes, you should trace those as well.
3. Add Labels and Legend
Add text to label the major roads and symbol typefaces as icons to label your destinations. Then create a legend to indicate what each symbol means. And to show you guests which way is north... place a little arrow and an "N" on the map.
4. Create Enlarged Areas
Follow the steps above except for the legend to create the inserts.
5. Add a hint of color!
This can include changing the color of the icons, adding a background color to the enlargements and putting a highlight around the path the guests are to follow from the Wedding to the Reception.
For those of you who want to know, I used the following Typefaces in the map.
Legend Title ~ Fontdinerdotcom Sparkly
All remaining text ~ Mona Lisa
Symbols ~ Zapf Dingbats
If anyone is interested in learning what I did in more detail, I can put together an in depth tutorial complete with Photoshop screen shots laying out each step. It wasn't the most elegant and precise way to make a map but it was effective. And in the end, I have a beautiful map to show for it!
Anyone else out there find themselves drawn into a wedding task that wasn't expected, found it hell to complete but loved the end results?


No comments:
Post a Comment